
|
Step by Step GuideThis document describes how to create a Flow4J project, extend it with tasks and integrate it in a sample java application. Prerequisites
make sure that the plugin is installed correctly.
You can check this if you display the installed
Plug-in details:
The Flow4J plug-in should be listed with the installed release number. 
Create a New Flow4J Project
In the first step create a new Flow4J project
from scratch.

In the following image you can choose
the type of the desired project.
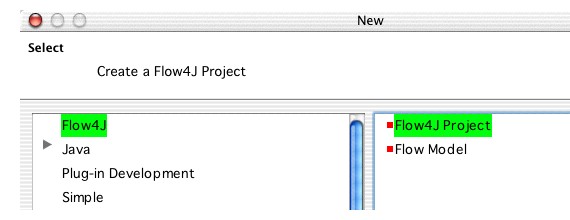
On the following page you can set the name of the
new project. Let's name it "MyFlow4JProj".
Click "Next > " to configure the java settings 
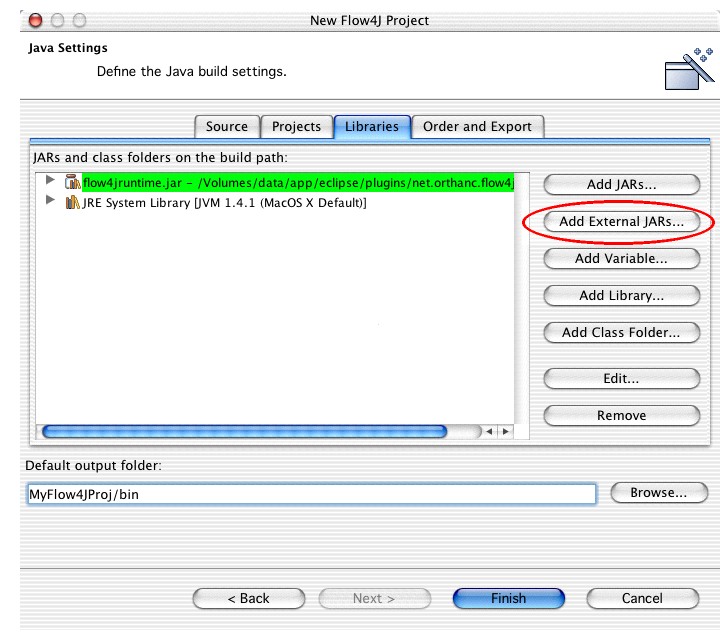
On the java configuration pane we set the following:
Configure the source and output folder as on the next image. 
On the "Libraries" panel add the "flow4jruntime.jar"
to the classpath. The external jar file resides in the
Flow4J Plug-in folder. Click on the "Add External jars..."
button to add the jar to the classpath.
The project is now created and you can begin with creating the tasks and modeling the flows. 
Create Package StructureIn this step, sample packages are created where we'll put all the flows and the tasks. Create the following package structure.
Of course, the flows and the tasks package can contain sub packages. But in this example we will put files flat in the packages, without using sub packages. 
Create HelloWorld TaskThe order, what you create first, the tasks or the flows does not matter. But its better to create the tasks first and then build the flow model, that uses those tasks. So we will forst create a HelloWorld task, that simply prints "hello world!" to System.out.
We create the new task class in the
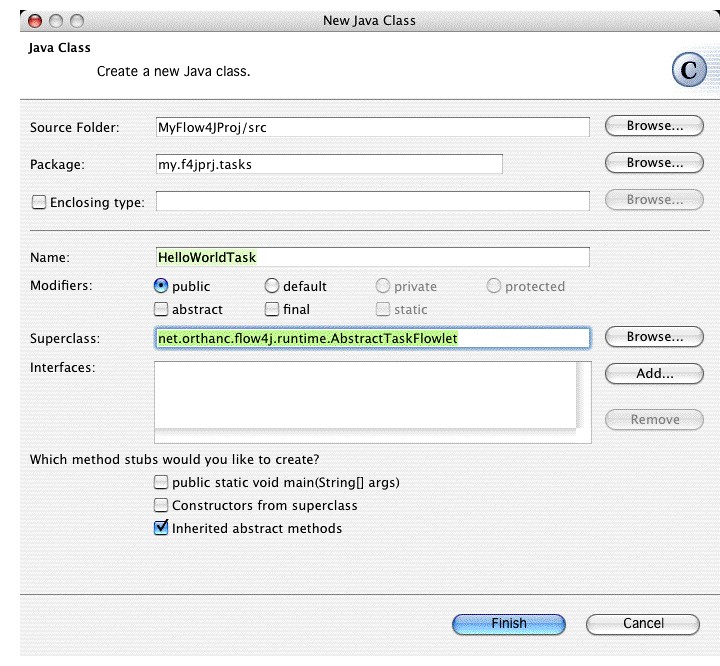
The following two methods have to be overridden/implemented by the user:
Here is a simple task implementation:
package my.f4jprj.tasks;

import net.orthanc.flow4j.runtime.AbstractTaskFlowlet;
import net.orthanc.flow4j.runtime.FlowDictionary;


public class HelloWorldTask extends AbstractTaskFlowlet {

	public String getName() {
		return "Hello World";
	}

	public void execute(FlowDictionary dictionary) {
		System.out.println("hello world!");
		//	some complex functionality
	}
}
Create HelloFlow Flow
After the task, as the atomic working unit, exists,
we can embed it in a flow with the "HelloFlow" flow.
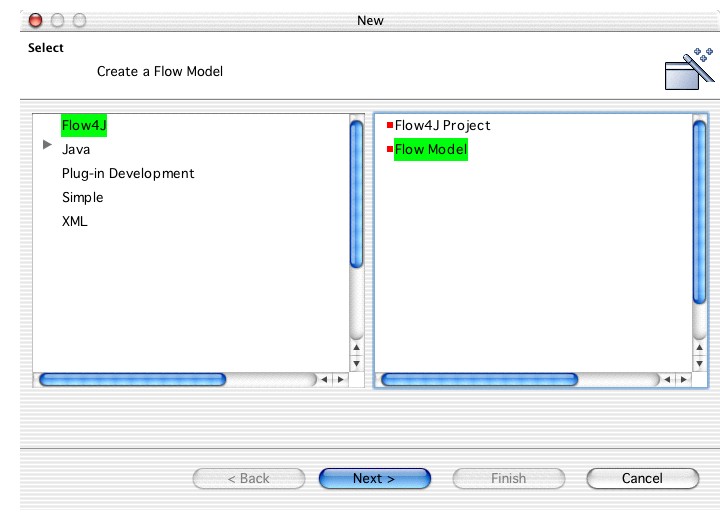
Specify the flow file's name and click "Finish" to create the file in the right package in the workbench 
My eclipse workbench was is configured the way that resource modifications force an automatic build process. The creation of the file "HeloFlow.f4j" was a resource modification for Eclipse, so the build process was triggered and the flow's java source code was created in the file "HelloFlow.java". 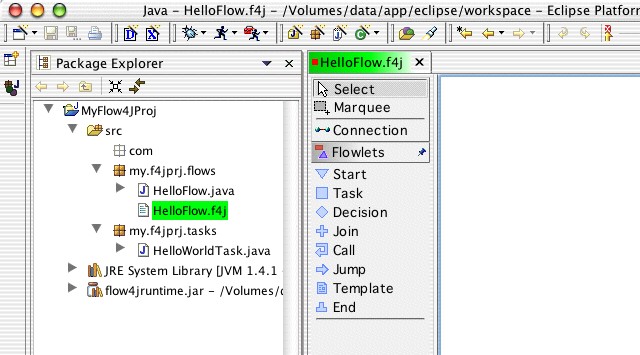
Now let's model the flow, that executes the helloWorld
task.

After you set the task flowlet's "Executable class" property, the flows name, that you specified in the HelloWorldTask.java file, is dispalyed in black. So you have an immediate feedback whether the task that you want to embed into the flow really exists or whether you made a mistake while typing the task class's fully qualified class name. 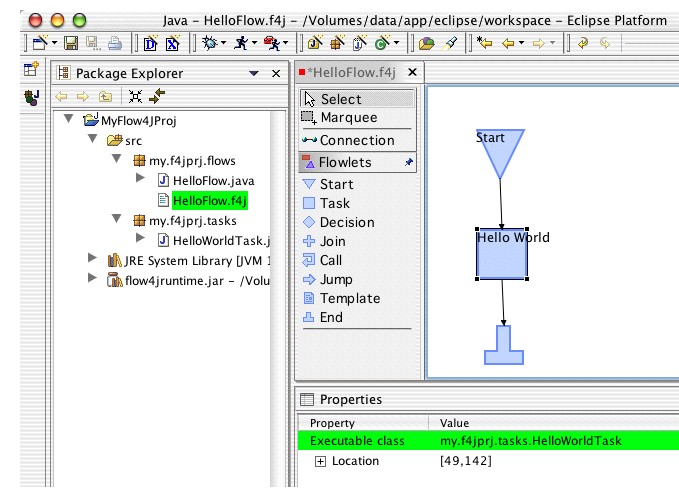
You can also rename the task-flowlet's label if you want. If you don't like the position of the task-flowlet's label then drag the label to another position. Moving the flowlet's symbol automatically moves the label, so the relative positions are preserved.
Only one step has to be done to finish the flow model,
the flow needs a unique name. With this name the flow
will be registered at the FlowManager and can be accessed later
from other flows, or by the JSPDispatcherServlet.

Flow Execution
Now that the flow is modelled and compiled successfully,
we can integrate it in existing java code and execute it.

|